How to Make a Healthy School Lunch

If you have kids headed back to school, you may be struggling with what to send in their lunch boxes.  While you want their meals to be healthy, you also want their lunch boxes to come back empty.  But there are definitely tips, tricks and creative meal ideas that will make creating lunches for your little ones.

yumbox

YumBox Lunch Box

PlanetBox

PlanetBox Lunch Box

Tip 1: Prepare a balanced meal in advance

The first step to building a healthy school lunch is to make sure meals are balanced by including a protein, a healthy fat and a carbohydrate.  If you can add fruit and veggies most days of the week, that would be ideal.  And it’s important to pack their balanced meals the night before.  Below is a mini checklist of how to balance your kids’ meal:

CARBOHYDRATE:
Pasta, Bread, Tortilla, Quinoa, Rice
PROTEIN:
Chicken (chicken sausage, BBQ chicken), Turkey (bolognese, deli slices from my ), Eggs (egg and cheese muffin, hard boiled egg), Beans (edamame, chili, hummus), Tofu
HEALTHY FAT:
Avocado (guacamole, chocolate avocado mousse), Olives, Olive Oil
VEGGIE:
Grape Tomatoes, Bell Peppers, Sugar Snap Peas, Baby Carrots
FRUIT:
Berries, Kiwi, Clementines, Bananas

Tip 2: Make meals look appealing
Your kids will be more likely to eat their lunches if they look appealing and fun to eat. One way is to present familiar foods in a fun way to entice them. For example, making funny faces or using cupcake holders are easy ways to make a typical meal more appealing.  Also engage them by offering items like dips, which most kids love.

I also highly recommend investing in a good lunch box. My two favorite lunch boxes are YumBox and PlanetBox.
YumBox is leak proof so you can put hummus or yogurt right in the lunch box. Plus they are absolutely adorable!
PlanetBox is made from stainless steel and includes removable parts so you can modify the box depending on what you’re including in their lunches.

Tip 3: Have your kids help in the kitchen
Have your kids help prepare the meals so they will be proud and excited about what they’re eating.  You can have your kids help by allowing them to choose between options (e.g. apples slices or orange segments, chicken or turkey, etc).  In addition, you can have them help by having them actually prepare the food (e.g. dip strawberries in chocolate, put veggies and cheese on a toothpick/skewer).

Tip 4: Use leftovers
Make meal planning easier by reusing leftovers. For example, you can make a big pot of chili, or even soup, for dinner one night and then send your child with it in a thermos for lunch later in the week. With meals like chili, you can also include a variety of food groups in one pot and also use up any other leftover foods that you don’t want to go to waste.

RECIPES!
Do you have a difficult time getting your child to eat protein, like chicken or beans? What about those healthy fats. Are your kids not fans of guacamole or olive oil in their pasta? Well, here are two of my favorite easy yet creative recipes that you can put in your child’s lunch box!

Mini Egg & Cheese Muffins
Servings: 24 mini muffins
Ingredients:
6 eggs
1/2 cup Cheddar Cheese
1/2 cup Mashed Potatoes (optional)
3 T Whole Wheat Flour
1/2 tsp Salt
1/4 tsp Pepper
1 T Applesauce (optional)
1/4 cup chopped Bell Peppers (optional)
Recipe:
1) Preheat oven to 350F
2) Place all ingredients in food processor and pulse till blended (whisk by hand if needed)
3) Spray mini cupcake tin with cooking spray
4) Fill tins 3/4 of the way full
5) Place in oven for 18-22 minutes

Chocolate Avocado Mousse
Ingredients:
1 Avocado
1 Ripe Banana
1/2C Milk Chocolate Chips (melt in microwave for 15 seconds at a time for 1 minute)
1/4C Cocoa Powder
1C Almond Milk
3T Chia Seeds (Note: Chia seeds make this a very high fiber treat!)
1-2T Agave
Recipe:
1) Chill Almond Milk with Chia Seeds for 20 minutes till Chias gel
2) Mix Almond Milk with remaining ingredients in a food processor
3) Blend well and chill!

What’s your favorite healthy school lunch to make? I would love to hear your tips, tricks and ideas!

Healthy Snacks for Your Summer Road Trip!

Click here for the San Diego 6 Segment!

So you’ve planned out your outfits (and maybe the outfits of your spouse and kids), your toiletries, and all the needed paperwork for your trip, but what about your snacks?  Every time I plan to just grab something on the road, I end up eating a whole bunch of not-so-good-for-you food, and that’s because it’s not easy to find healthy choices when on the road!  And while it’s not bad to stop through a drive-thru along your journey, you want to make sure you are also equipped with some healthy snacks to keep you and your passengers happy… and not hangry.  Here are a few of my favorite road trip snacks…

~
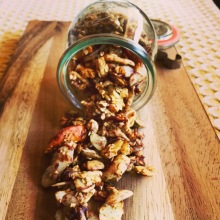
Homemade Granola.
Most store-bough granola is laden with refined sugars and added oils so I love to make my own.  Plus, that way I can add the nuts and seeds I like and omit what I don’t (I’m talking to you, raisins!)

Chocolatey Maple Banana Nut Granola
Ingredients:granola
2C Rolled Oats
1C Pumpkin Seeds
3/4C Sliced Almonds
3/4C Halved Cashews
1T Coconut Oil
2T Almond Butter
2T Maple Syrup
1 small very ripe Banana
Dark Chocolate Chips

Recipe:
1) Mix 2C Rolled Oats, 1C Pumpkin Seeds (I used sprouted), 3/4C Sliced Almonds, and 3/4C Halved Cashews in bowl
2) Blend 1T Coconut Oil, 2T Almond Butter, 2T Maple Syrup and 1 very ripe Banana in food processor
3) Pour wet ingredients over dry ingredients and mix
4) Place parchment paper over pan and spread granola mix
5) Place in preheated oven (325-350) for 12 minutes, stir well and place back in oven for another 10-15 minutes
6) Once out of the oven and cooling, add 3T Dark Chocolate Chips and mix
7) Cool then store in glass container

~
Cucumbers.
 Cucumbers are an incredibly hydrating snack. Cucumbers are 95% water to keep you refreshed on your long journey.  Plus, they are packed with B vitamins for energy and soluble fiber to help you stay full.  I absolutely love a cool, crisp cucumber to munch on my drive but you can also get creative with cucumber roll-ups.

Cucumber & Dill Cream Cheese Roll-Ups
Ingredients:cucumber rolls
English Cucumbers
Cream Cheese
Fresh Dill, Chopped

Recipe:
1) Slice Cucumbers thinly using a mandolin or vegetable peeler
2) Add about 1/2 – 1T of Cream Cheese with chopped Dill till along the slice
3) Roll!

~
Garbanzo Beans. All beans are a great source of plant-based protein and fiber.  Not only does fiber help you stay satisfied, but it also helps slow down sugars from rapidly absorbing into your bloodstream.  This helps keep your blood sugars stable because, let’s face it, nobody wants to be in a car with kids (or spouses) jumping off the walls from a sugar high and then melting down when they crash!

Roasted Cajun Chickpeas
Ingredients:
1 Can of Garbanzo Beans
Olive Oil
Cajun Seasoningroasted chickpeas
Salt

Recipe:
1) Rinse Garbanzo Beans well
2) Dry well on paper towel
3) Place beans in bowl and mix with 2T of Olive Oil, 1T cajun seasoning and a dash of salt
4) Place in 375F preheated oven for 20 minutes
5) Take out of oven, flip beans and turn up oven to 400F
6) Place back in oven for 10 minutes
7) Stir beans again and check for readiness
8) Place back in oven for another 5-12 minutes
9) Add additional seasoning
10) Cool to room temperature or enjoy warm!

What’s your favorite snack for the road?

Healthy Memorial Day Menu

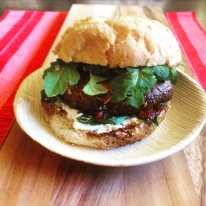
Grilled Portobello Mushroom Burgers

Burger

Portobello Burger

INGREDIENTS:
For the Mushroom:
-1 Portobello Mushroom
-1 T Balsamic Vinegar
-1 T of Olive Oil
-1/2 t minced Garlic
-1 T Rosemary
-1 t Pepper
-1/2 t Salt
For the Topping:
-1 Whole grain bun
-1 T Goat Cheese
-3-4 halved Sun-dried Tomatoes
-1 T Chopped Basil
-1/8 C Arugula (optional)
RECIPE:
1) Clean the mushroom very well
2) Mix the following ingredients in a bowl: balsamic vinegar, olive oil, garlic, rosemary. salt + pepper
3) Paint ingredients on both sides of each mushroom and allow to marinate for 15 minutes
4) Heat your grill (using either your BBQ or grill pan) to medium
5) Place mushrooms on grill and heat 5-8 minutes on each side
6) Brush bun with olive oil and toast for 2 minutes on grill
7) Spread goat cheese on bottom bun with chopped basil and sun-dried tomatoes
8) Enjoy!

Chipotle Bison Burgers
Servings: 4
INGREDIENTS:

-1lb Bison
-1T Chipotle Hot Sauce (I personally LOVE Cholula!)
-1T of fresh minced Garlic
-1t Salt and 1t Pepper
-Cheese (Optional)
RECIPE:
1) Heat on grill at medium
2) 4-5 minutes per side (internal temp of 160)
3) Add cheese for last 2 minutes (optional)
4) Place on Bun or Butter Lettuce

Lemon & Dill Greek Yogurt Potato Salad

Lemon & Dill Potato Salad

Lemon & Dill Potato Salad

INGREDIENTS:
-1 lb Red Potatoes
-1/4 C 2% Greek Yogurt
-1/8 C chopped fresh Dill (you may want to start with less and then add more!)
-1T Lemon Juice
-Salt + Pepper to taste
RECIPE:
1) Place potatoes in large pot with water (should cover potatoes well)
2) Add salt to pot
2) Boil on stove for 25-30 minutes
3) Cool
4) Quarter potatoes (may need extra time in fridge)
5) Add dill, lemon juice, salt + pepper
6) Mix well (putting the potatoes in a Tupper Ware container and shaking makes it easier to mix!)
7) Store in fridge
8) Don’t tell guests you used Greek Yogurt;)

Grilled Peaches with Mascarpone

Grilled Peaches

Grilled Peaches with Mascarpone

INGREDIENTS:
-Halved Peaches
-1/2 T Coconut Oil
-1 T Mascarpone (mixed with 1 t cinnamon and 1 t Honey)
-NOTE: You can easily swap the mascarpone with Greek yogurt!
RECIPE:
1) Brush peach halves with olive oil
2) Place peaches on grill low/medium
3) 3 minutes on each sides
4) Place mascarpone mixture on top
5) Serve warm or at room temperature!

Lemon Spritzers
RECIPE:Minty Lemonade Spritzer
1) 2 juiced lemons
2) Put in shaker with ice, 1/2 packet Stevia, and mint
3) Pour over Sparkling Soda and Ice
4) Enjoy as a mocktail or cocktail by adding rum or white wine!

Watermelon Spritzers
RECIPE:
1) Blend 1 cup Watermelon
2) Pour in shaker with Mint, Honey, Ice Cubes and shake
3) Add 1 cup Sparkling Water to a mason jarWatermelon Spritzer
4) Pour watermelon blend through shaker over Sparkling water and stir
5) Enjoy as a mocktail or cocktail by adding rum …coconut rum is especially yummy in this;)

Click here to check out my segment featuring these recipes on KUSI!

Spring Clean Your Kitchen and Your Diet!

Spring is in full swing, and that means it’s time to start crossing off your list of spring cleaning projects. But there’s one room in the house many of us tend to overlook –the kitchen! Not only is it important to give your kitchen a good scrub down, it’s also a great time to give your family’s eating habits a fresh start. Here are 5 easy ways to help you spring clean your kitchen… and diet!

1) Deep clean your kitchen. It’s easy to have an out of sight out of mind mentaliSpring Clean Your kitchen!ty when it comes to the germs lurking in your kitchen, but it’s important to tackle your kitchen head on. Not only is it where your family frequents most, but it can often be the source of foodborne illnesses. On your to-do list, be sure to include the fridge, the cupboards and pantry, the microwave, the toaster and the oven too! While the task may seem daunting, the feeling you get once your kitchen is clean is like no other. So put on a fun playlist, grab the gloves and dive in!

2) Out with old. Grab a giant garbage bag and toss any expired or questionable items. The spice rack can be the most confusing. Most spices and dried herbs are fine to eat 1-3 years after opening, and usually just lose flavor over time. However, if you’re not sure if something is safe to eat, remember the saying- when in doubt, throw it out!

3) Make a grocery list. Did you know people who go to the grocery store without a list buy twice as much as shoppers who use a list? And going to the store empty-handed makes you more susceptible to making less healthy choices as well. Use an old-fashioned scratch piece of paper or just type your list in your smart phone.

4) In with the new. Focus on filling your fridge with fresh fruits and veggies. The best way to make sure you use the produce you buy is to wash it and put it in a glass bowl or container as soon as you get home. You can also freeze certain fruits to make a great warm weather treat that you can eat plain or use to make smoothies. Want to add a spring touch to your kitchen without having to buy expensive flowers? Try buying a basil, mint, and/or rosemary plant and placing in bright-colored pots. Not only do herb plants look nice but they smell great too. Plus, the kids will have fun picking the leaves when it’s time for dinner!

5) Give your meals a makeover. Did you toss out a jar of mayo or an old bag of chips that you found in the back of the pantry? Instead of buying the same thing, think about replacing unhealthy items with healthier versions. For example, Greek yogurt can be used as a dip by adding lime and cilantro, as a snack by topping with fruit, or as an “ice cream” by blending with frozen bananas, hazelnut butter and chocolate… trust me, it’s really good! You can also makeover your snack foods. Replace store-bought trail mix with your own DIY versions that your kids can help make; replace bagged popcorn with home popped popcorn and top with olive oil and rosemary; and swap chips with roasted chickpeas!

Banana Turmeric Smoothie

Turmeric is an amazing anti-inflammatory. You can add it to savory dishes and sweet ones! Increase the anti-infammatory properties by adding black pepper… sounds strange but gives it a chai-like flavor. Here’s my easy turmeric smoothie.

Ingredients:Banana Turmeric Smoothie
-1 Frozen!
-Frozen Banana Slices
-1 C Almond Milk (or Milk of choice)
-1/4 C Plain Greek Yogurt
-1t Agave or Honey
-2t Turmeric
-Pinch of Black Pepper
-1/2t Cardamom (Optional)

Recipe:
-Blend with Ice (yep, that’s it!)
-Enjoy this energizing healing smoothie for breakfast or as a great pick-me-up snack!

How to Get Your Kids to Eat Healthy So You Can Too!

Tips-to-get-your-kids-to-eat-healthy

It’s hard enough to eat healthy when you’re juggling your kids’ jam-packed schedules as well as your own professional and household responsibilities. Then throw goldfish, string cheese and fruity yogurt pouches into the mix and you have a recipe for a diet disaster. While kids are programmed to stop eating when they’re full, it’s not so easy for us adults. All the snacks foods we have on hand for our little ones can create mini landmines in our efforts to eat healthy. But there are a few tips to get your kids to eat healthy so you can too!

Tip 1: Make healthy food fun

You may be familiar with this trick already but making healthy food fun is a great way to encourage your children to eat the healthy foods that you like to eat. Try making happy faces with veggies and chicken on English muffin pizzas, putting fruits on kabob sticks, and creating tasty healthy dips with yogurt and maple syrup. The possibilities are endless!

Tip 2: Get your kids cooking

Cooking with your kids is a great way to get your little ones to explore new foods and teach them about healthy eating. Even if they don’t want to eat all the foods they make, they will still feel proud of their creations and be more likely to try foods they don’t typically eat. An added bonus of having your child help in the kitchen is that it’s a great activity to keep them busy while you get the cooking done!

Tip 3: Get your kids cooking

Most moms may not have much luck getting their little ones to eat brussel sprouts, broccoli or bites of their beloved kale salads and that’s OK. Veggies in the cruciferous family tend to be slightly bitter and also exceptionally low in sugar, which means not so kid-friendly. But one mom-tested, kid-approved way to get your child to eat more vegetables is to choose sweeter veggies, like butternut squash and beets. Then bring out the natural sweetness by roasting them with a touch of white vinegar, a squeeze of lemon and butter/olive oil. Add to the appeal by cooking up a rainbow of veggies!

Tip #4: When in doubt, smoothie it out

Most kids have no problem gulping down fruit smoothies, but one sight of your green smoothie and you may hear the words, “ewww!” So how can you make a one-smoothie-fits-all so you’re not spending all afternoon feeling like you work at a Jamba Juice? Try adding bright-colored frozen berries, like blueberries, to your green smoothie. The pigments, known as anthocyanins, are not only rich in nutrients, but also color. That means your icky green spinach smoothie will turn into an appealing purple at the press of a blender button.

Tip #5: Make it a theme night

Here in San Diego, we love our Taco Tuesday! Even if Taco Tuesday no longer means half-priced fish tacos and margaritas, it’s a great way to make dinner easy and healthy for the whole family. Just put out some whole wheat or corn tortillas, which are both higher in fiber and nutrients than white tortillas, some veggies (e.g. bell peppers, shredded lettuce, and salsa), and protein (e.g. chicken, beef and/or beans), and you are good to go! Whether it’s Taco Tuesday, Spaghetti Saturday or Meatless Monday, theme nights can take the stress out of having to wonder what to make for dinner.

Check out this blog featured on MomCO App!

Valentine’s Day Recipe… Gluten and Guilt-Free Cheesecake Cupcakes

So it’s true I may have taken a little hiatus from blogging after I had only begun my own blog.  However, writing and reading other people’s blogs is so inspiring to me that I had to ask myself, what has kept me from writing?  The truth is, there are so many topics percolating in my head that I find it difficult focusing on one, but I realized that I needed to stop overthinking and start writing what’s on my mind.  So, in order to allow the roulette ball land wherever it may, today, I am featuring the guilt-free gluten-free waffle cheesecake cupcakes I made on Valentine’s Day.

The recipe I’m going to share is a perfect Valentine’s Day treat because not only is it an expression of my love of sweets and cheese (combined!), but it is also an ode to my love of not having to squeeze into my jeans.  And while this may not be the timeliest of pieces (I do realize it’s February 16th), the cupcakes are absolutely delicious, healthy and easy to make.  And, of course, you can make this recipe at any point for any reason. In fact, I encourage you to do so… I even ate one for breakfast before yoga.

Ingredients
-2 gluten-free frozen waffles
-8 oz 1/3 less fat cream cheese, softened
-1/4 cup sugar
-1 t vanilla
-1/4 t cinnamon
-1 1/4 cup fat-free vanilla Greek yogurt
-3 large egg whites
-1 T lemon zest
-3 T lemon juice
-1 T almond flour (can substitute for any flour)
-1/2 cup berries, chopped
Directions
1) Heat oven to 350 degrees.
2) Line cupcake tin with liners.
3) Toast 2 gluten-free waffles of your choice and then slice them in the middle (with a sharp knife). Then cut the 4 waffle “tops” into 12 pieces and place them in the cupcake tins.
4) Gently mix cream cheese, sugar and vanilla till smooth with an electric mixer. Slowly add yogurt, egg whites, lemon juice, zest, cinnamon and flour. Do not over beat. Pour on top of waffles, filling 3/4 way.
5) Bake 20-25 minutes. Cool to room temp in refrigerator.
6) Place chopped berries of your choice on cupcakes.

Calories: ~120 (depending on waffle brand)
cupcake

Summer Salad with Avocado & Baked Tofu

Summer is in full-swing and I thought what better time to introduce my favorite type of meal, salads!  That may sound a little boring and cliché since I’m a dietitian, but my obsession with salads is not just because they are the quintessential healthy meal.  It’s actually because with salads you can be creative with flavor combinations without having to worry so much about presentation.  In other words, I’m a little messy in the kitchen and salads are perfect for not so artistic cooks like me:)

So the salad recipe I’m highlighting today is a simple summer salad with avocado and baked tofu.  It is hearty enough to have for lunch but light enough so you can feel more comfortable in your skin.  And speaking of skin, an added plus is that the ingredients used are especially great for our skin.  After all, we do show more of it during the summer.

Summer Salad with Avocado and Baked Tofu
Servings: 4
-3 cups Spring Mix Lettuce
-1 cup Arugula
-3/4 cup halved Cherry Tomatoes
-1/8 cup Pine Nuts
-1 medium Avocado, diced
-2 T Olive Oil
-1 package Extra Firm Tofu
-1/4 cup Blood Orange Vinaigrette

Directions:

Baked Tofu
1) Slice tofu into 1/2 inch thick slices
2) Place on paper towel or cloth napkin covered by another towel with an object on top to help press liquid out. Drain for at least 15-20 minutes. Once drained, cut the tofu so they are about 1″ x 1″. Place tofu in bowl with 2 T of olive oil and a pinch of salt and pepper. Mix, being careful not to break up tofu.
3) Preheat oven to 375 degrees.
4) Once oven is ready, place tofu slices on pan that has either been coated with cooking spray or with olive oil. Bake for 12-15 minutes and then flip them and bake for another 12-15 minutes (30 minutes total). Depending on your oven and preferred crispiness, continue baking for another 2-3 minutes.
5) Let cool.

Salad:
6) Mix the arugula and spring mix lettuce. Then add the rest of the ingredients. Note: when cutting cherry tomatoes in half, discard the excess liquid.
7) Mix in blood orange vinaigrette prior to serving.

tofusalad

This salad is my go-to salad during the summer because I can make a big batch on Sunday and bring it work for lunch throughout the week.  As much as I love cooking, I prefer to spend my time outdoors during the warmer months.  The summer salad with avocado and baked tofu is packed with protein, healthy fats and ingredients that protect the skin from sun damage.  Here’s a nutrient breakdown:

Lycopene: Lycopene found in tomatoes and other red fruits and veggies act as a natural SPF.  It is nature’s way to protect the skin before sunscreen was invented and  the sun was not as strong.  You get the largest benefit from lycopene by adding a fat source, like olive oil, nuts or avocado, which increases its bioavailability.

Fatty Acids: Just thinking about avocados and nuts makes my skin feel more supple and moisturized.   And turns out my imagination is not totally crazy.  Healthy fats are known to keep skin hydrated and help prevent inflammation.  Worried about the calories?  Researchers recently found that people who ate a half an avocado per day were more likely to be slimmer and have healthier diets than those who didn’t.

Vitamin E: Avocados and nuts are not only packed with healthy fats but they are also excellent sources of Vitamin E.  Vitamin E works with Vitamin C to prevent oxidative damage of the cells.

Vitamin C: Vitamin C in citrus and leafy greens helps maintain your skin elasticity.  That’s because ascorbic acid is needed for collagen production, which aids in skin firmness.  Also, Vitamin C is an antioxidant, which scavenges the free radicals found to cause damage to skin.

Isoflavones: Isoflavones found in tofu and other soy products have been shown to help prevent wrinkles and preserve collagen.  In addition, tofu is also a great source of lean protein, which is great news for people who don’t eat much meat, like me!

What is your favorite salad to make?  Any ingredients you would add or replace?

Blood Orange Vinaigrette

It took me a long time to finally start a blog, but it took me even longer to decide on the topic for my first post.  I mean, what could be worthy of my very first blog post?!  And then, as I was shopping in the produce section of my local market, I was stopped short by a glorious stand of blood oranges.  Little crimson-stained gems of juicy amazingness that, in an instant, brought me back to Italy where I had been only the week before.  I was starstruck in a way that only food lovers would understand.  After I pulled myself together (yes, I get a little excited during times of food epiphanies), I grabbed a bunch and figured I could somehow incorporate them into the salad I was planning to make for dinner that night.  And voila!  I decided that my first post would be how to make blood orange vinaigrette!

Now, I’d like to preface this recipe by disclosing that I am not normally a citrus in my salad kinda girl.  I’ve always been of the notion that fruits are for sweet things like dessert or drinks, not salads or main courses.  But not blood oranges.  Their rich flavor with a hint of citrus somehow cuts into the dressing perfectly.  So here it is:

Blood Orange Vinaigrette
-1/4 cup Extra Virgin Olive Oil (Note: Trader Giotto’s Sicilian Selezione from Trader Joe’s is the most authentic reasonably-priced olive oil I have found, but please let me know if you have other recommendations!)
-3 T of white balsamic vinegar (it’s a slightly blander alternative to regular balsamic)
-1/4 cup blood orange juice
-pinch of salt and pepper
-1 t of blood orange zest (Optional)
-1 T basil, chopped (Optional)

Directions
1) Whisk them all together!

Nutrition Informationblood orange
5 servings (2T each); Calories=135; Total Fat=11g; Sat. Fat=1.5g; Fiber=1g; Vit. C=52%

How to use leftover blood oranges:
-Blood Orange Mimosas!
-Eat the fruit as a snack… just be careful because they are a little messy!

Spotlight on the Blood Orange
With the beauty of a mesmerizing sunset and a name as gruesome as Italian history, the blood orange has origins as exotic as the fruit itself.  Some historians point to roots in the Mediterranean and others in China, but wherever they came from, blood oranges are most commonly associated with Italy.  In fact, if you’ve been to Italy or plan to go, you’ll see them everywhere!  The reason blood oranges grow so perfectly in Italy (and in California, for that matter) is due to the temperate climate and low nighttime temperatures during the winter.  Here are a few pictures of my fiancé and I shopping at the Campo de’ Fiori market in Rome, where we picked up some of these gorgeous iridescent fruits.

IMG_2026Market in Campo De' Fiori in Rome

 
Market in Campo De’ Fiori in Rome

Health Benefits of the Blood Orange:

So you may be wondering what gives the blood orange its ruby colored flesh.  As a nutritionist, the reason gives me so much joy.  It actually has to do with the presence of a pigment called anthocyanin.  Anthocyanin pigments are also found in berries, eggplant and red cabbage, among other red, purple and blue plant foods.  Anthocyanins are packed with healthful benefits, including antioxidants, which scavenge the free radicals linked to diseases, like cancer, and ageing.  Of all the citrus fruits, the blood oranges is the only one that houses anthocyanin as well as all of the other citrus vitamins, like Vitamin C.

Tips:

-Store in the refrigerator for up to 2 weeks.

-In season from winter to spring.